

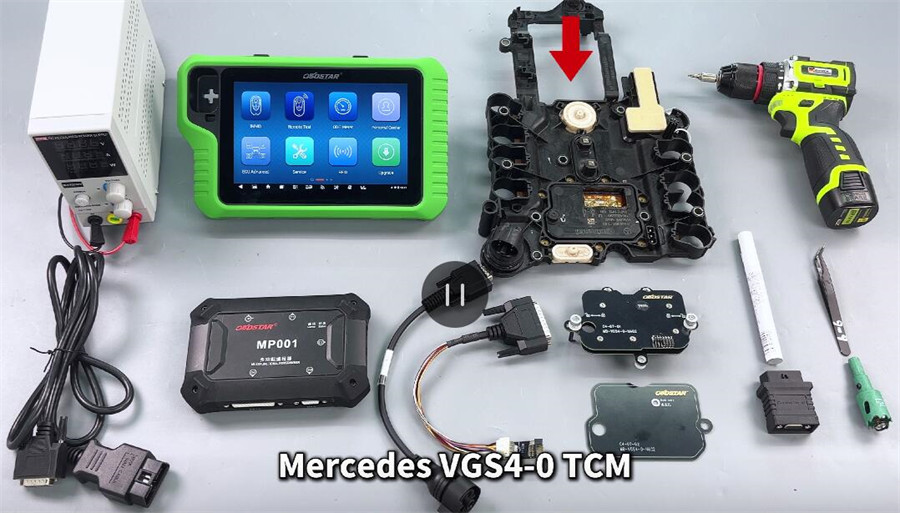
This guide details the process of virginizing (erasing) and transferring data from a used Mercedes-Benz VGS4-0-NAG2 722.9 7-Speed TCU using the OBDSTAR X300 Classic G3 with the C4-07 Adapter Kit in JTAG mode.
Compatibility
- TCU Model: VGS4-0 (722.9 7-Speed)
- Vehicle Applications:
S-Class (W222)
E-Class (W205)
GLC (W166)
Year: 2014+
Note:
Used TCUs require JTAG mode (via C4-07 adapter) for virginization, while original TCUs support direct BENCH/OBD programming.
Required Equipment
Hardware
OBDSTAR X300 Classic G3 with ECU Flasher License (or DC706 Full)
OBDSTAR MP001 Programmer
OBDSTAR C4-07 Adapter Kit Full Configuration (includes):
- C4-07-01 (Soldering-free board)
- C4-07-02 (Custom positioning board)
- W011 + W020-V1.1 cables
- 22mm custom drill head
- Converter V2
- TCM-012 Benz VGS Adapter
Handheld electric drill
Marking pen
Tweezers
Power supply
Software
OBDSTAR ECU Flasher (latest version)
Step-by-Step Procedure
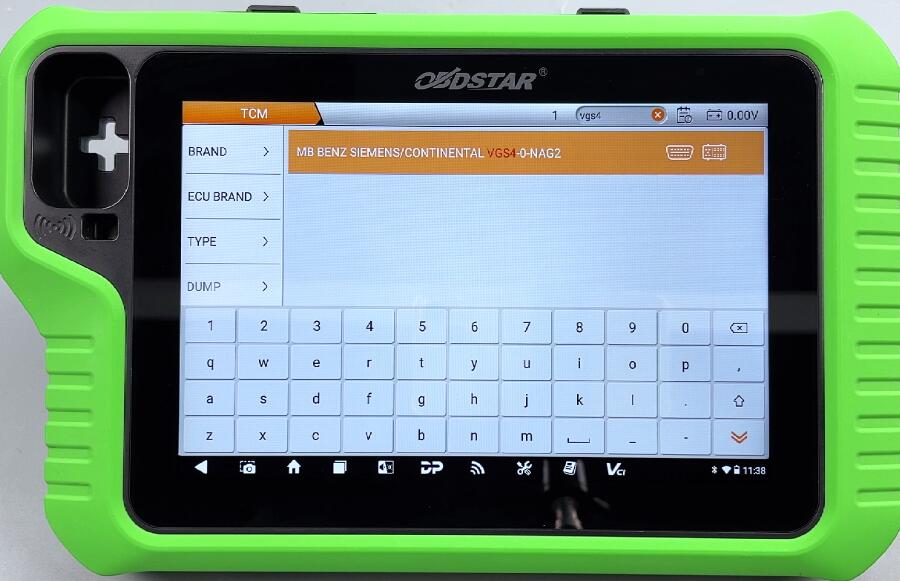
Step 1: Software Setup
Launch ECU Flasher on the OBDSTAR X300 G3.
Select TCM → Choose the latest software version.
Input “VGS4” in the top-right search bar to find “MB BENZ SIEMENS/CONTINENTAL VGS4-0-NAG2”
Select JTAG mode and MP001.
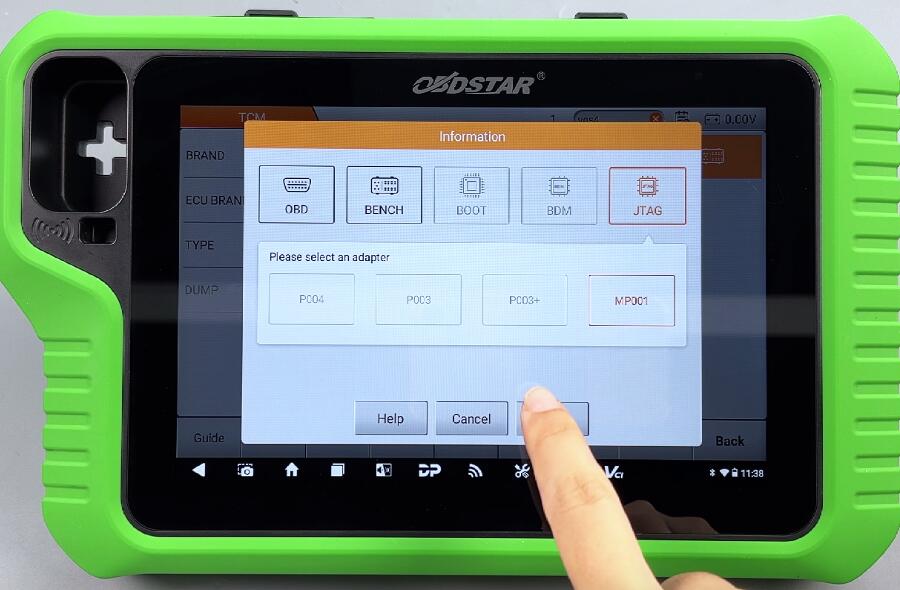
Tap [Guide] and review:
- Warnings
- Function overview
- Kit components
- Connection diagrams

Step 2: TCU Preparation & JTAG Connection
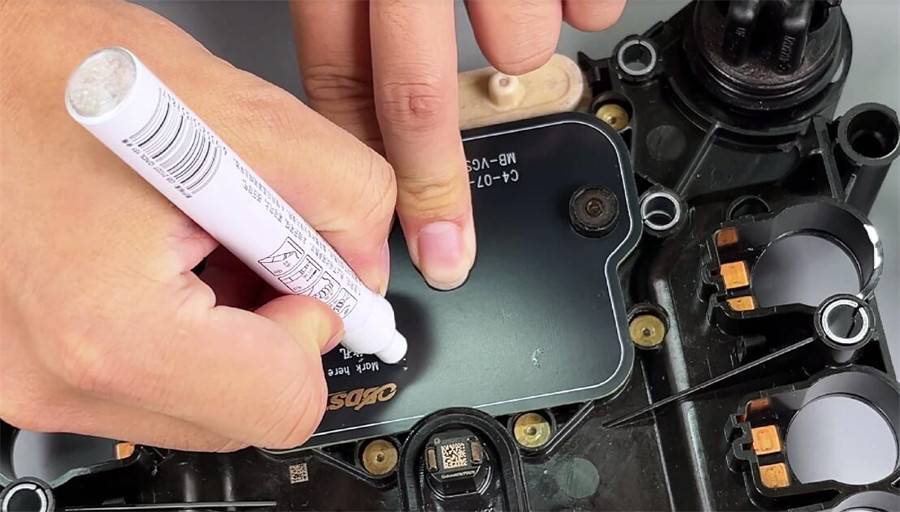
1. Positioning & Drilling
Place the C4-07-02 positioning board on the TCU.
Use a marker to mark drill points
(Optional) Use a soldering iron to preheat marked spots to prevent drill slippage.
Carefully drill using the 22mm bit (avoid excessive depth).
Use compressed air to remove debris

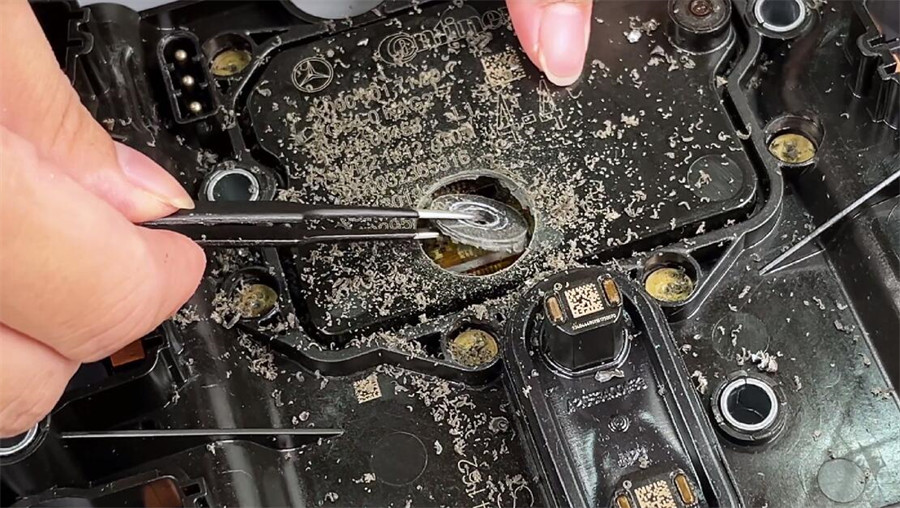
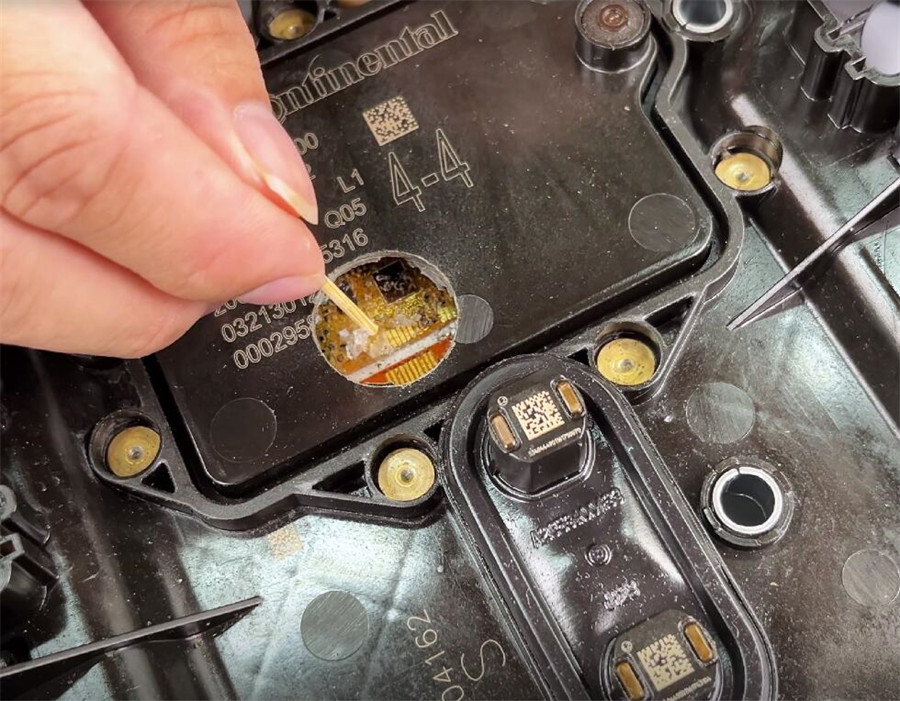
2. Exposing JTAG Contacts
Use tweezers to pry open the drilled section.
Use a wooden stick to clear adhesive over gold fingers (avoid scratches).

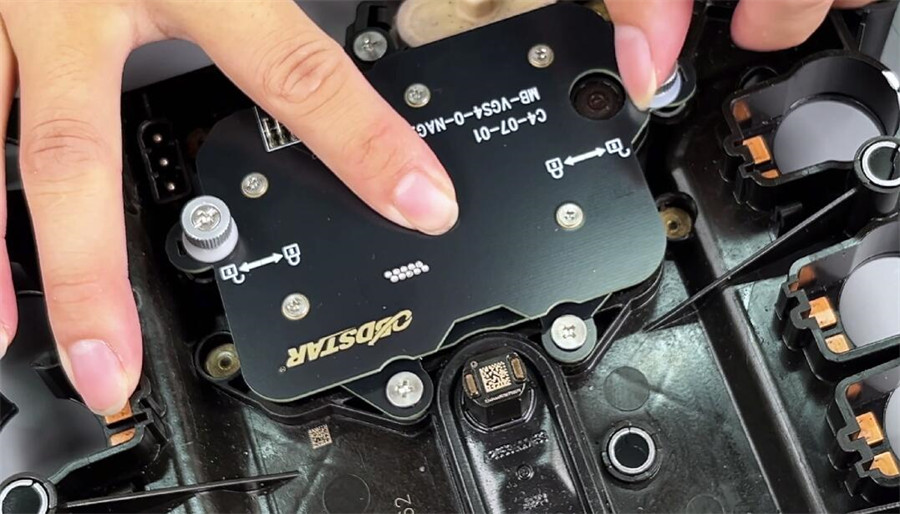
3. JTAG Connection & Virginization
Install Adapter:
Align C4-07-01 with the TCU’s 3 locating pins and lock firmly.
Connect Hardware:
Attach MP001 Programmer → C4-07-01 Adapter.
Plug TCM-012 cable into the programmer.
Power on the MP001.
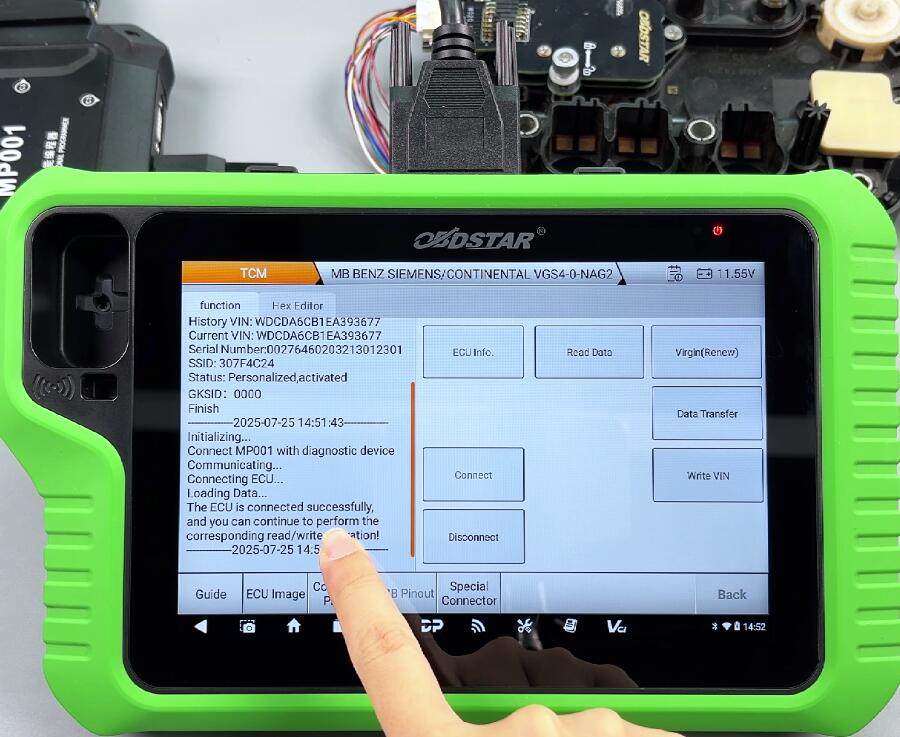
Backup & Erase TCU:
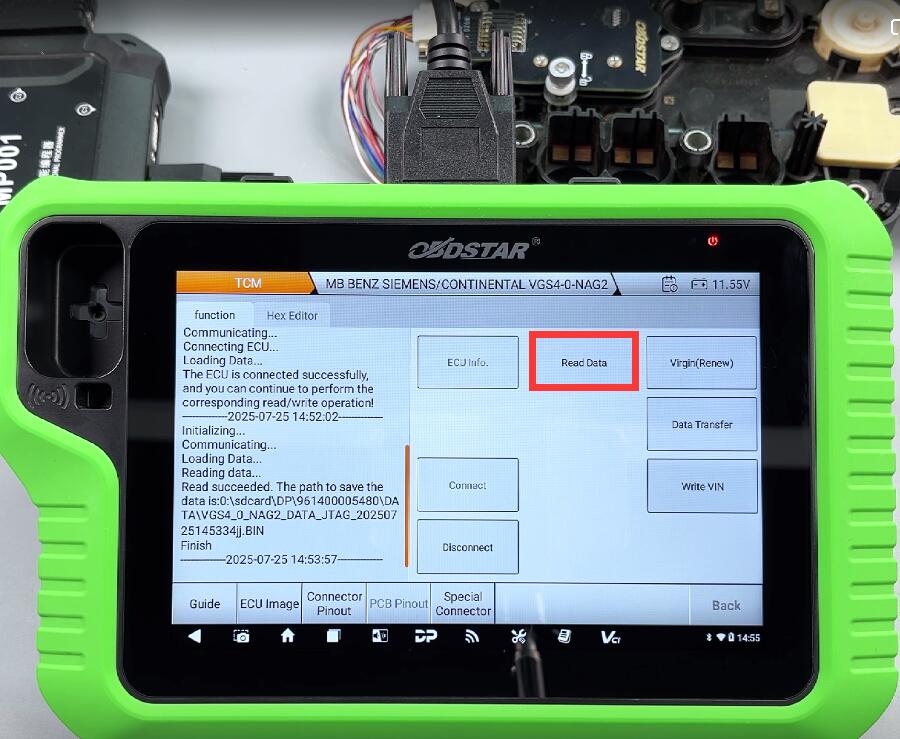
Read TCU info, the status will show “Personalized/Activated”.
Click Connect to connect ECU
Click “Read Data” to read and save original file (backup critical!).
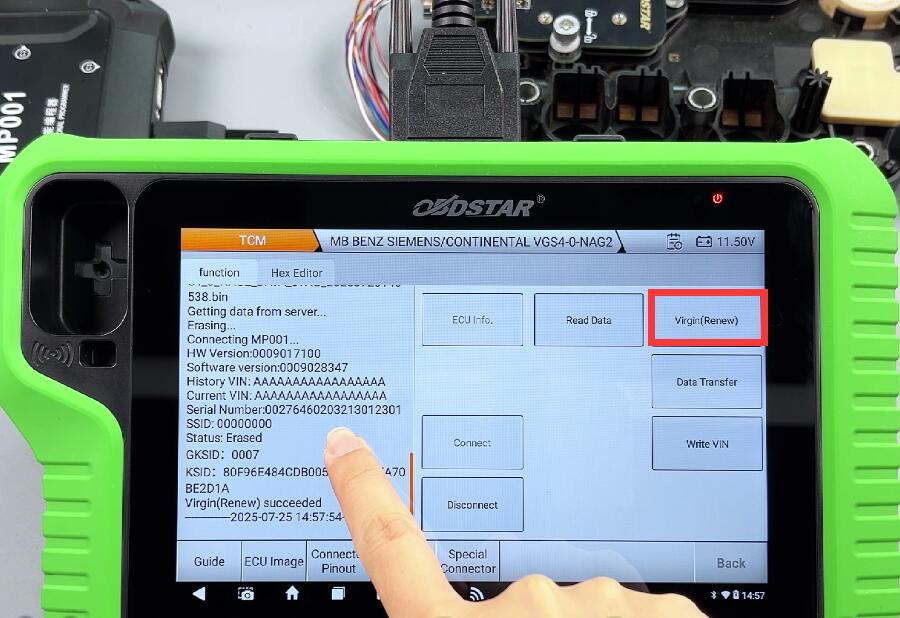
Click “Virgin (Renew) to erase TCU (removes VIN/adaptations).
TCU status will show “Erased”
Step 3: Data Transfer & Installation
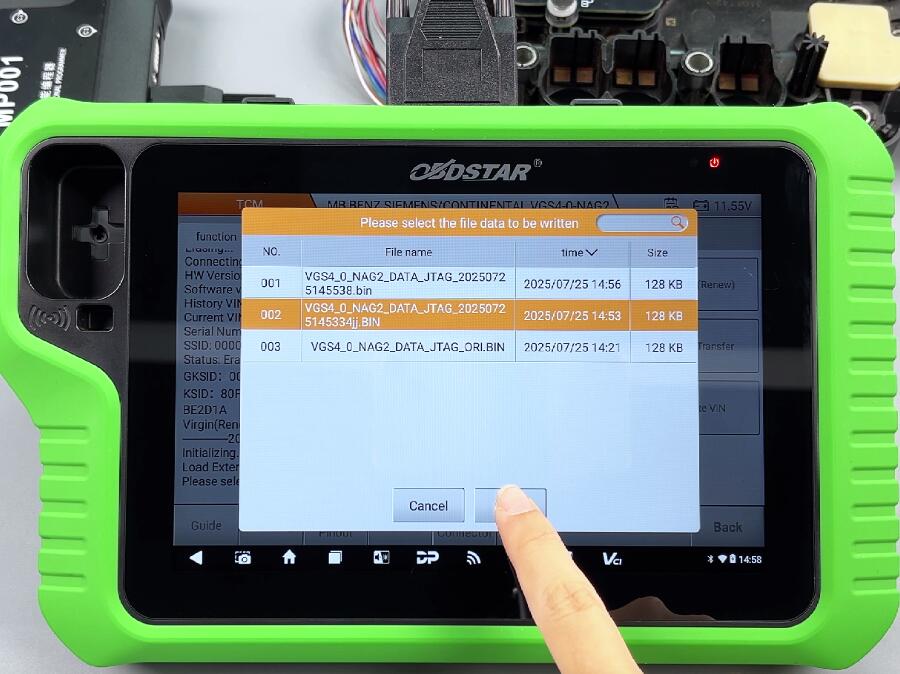
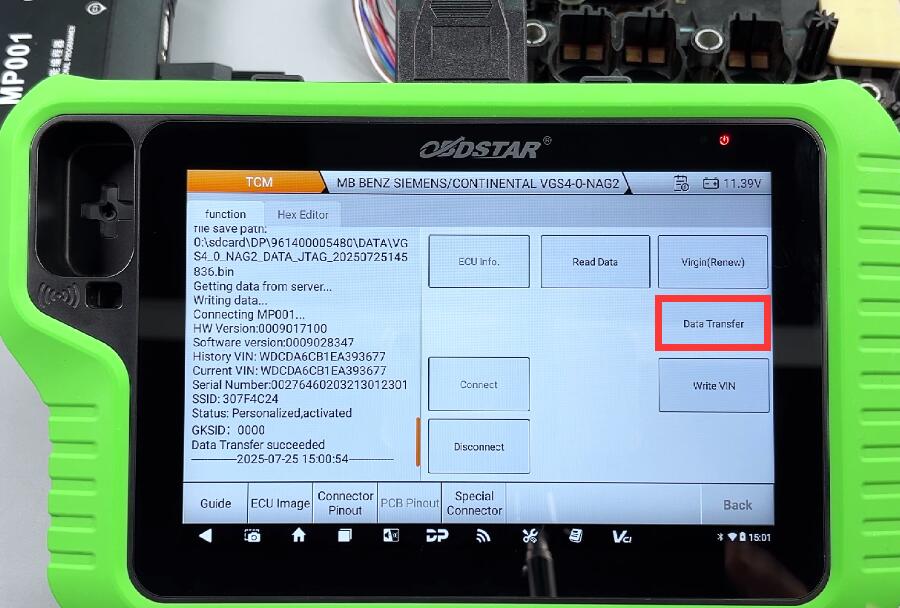
Case 1: Program on bench
Write the original vehicle’s TCU data to the used TCU.
Install TCU → Vehicle should start normally.
Case 2: Program in vehicle
Install virginized TCU in the car.
Use MB Star Diagnostics to program
Finally, seal the drilled hole (if needed) and store backup files securely.
Important Notes
✔ Always back up original data before virginizing.
✔ Drill carefully to avoid damaging internal components.
✔ Use proper anti-static precautions when handling the TCU.