


Today’s updated article will talk about the stuff about OEM Diagnostic Driver Installation & Update for VXDIAG Diagnosis Tools. The VXDIAG For XENTRY Diagnosis VCI and ALLSCANNER VXDIAG A3 will be taken as the typical examples as always being the cost effective auto diagnostic tools in Cardiagtool UK ESHOP.
Come and see what has been updated exactly in this article.
Part1. How to Install OEM Diagnostic driver?
Attention here:
Please make sure the License has been purchased and updated
Please make sure the device is connected. Run VX Manager.
Please make sure the network is connected.
1.VX Manager can manage multiple original diagnosis functions

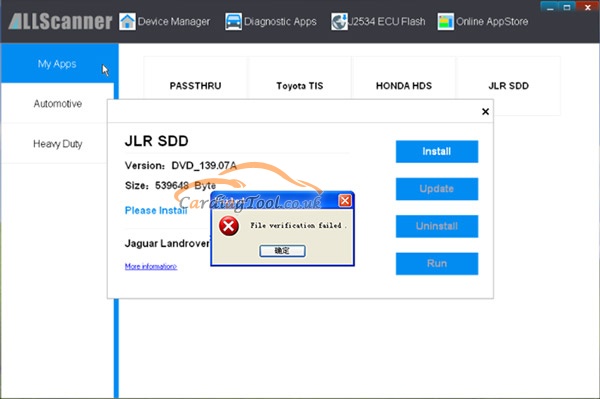
- To use the original factory diagnosis functions, you will need to buy corresponding License and install corresponding vehicle diagnosis driver. For example Installation JLR SDD driver.
Click [Diagnostic Apps] -> [My Apps], then click [JLR SDD] and you will get a driver installation window.
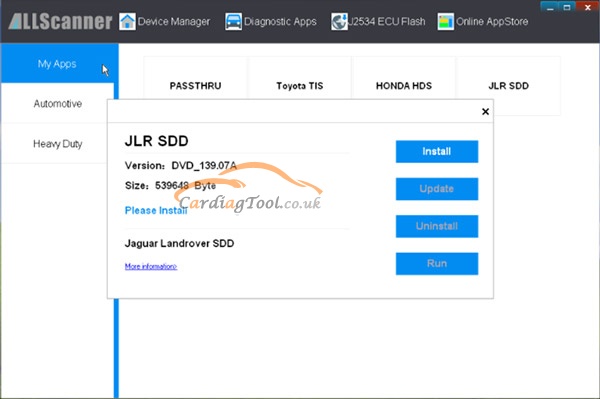
- Click [Install],VX Manager will download the newest diagnostic driver from server and install, then you can start to use the original diagnosis function. The installation UI is below:

All right. Let’s move on!
Part2. How to Update OEM driver? (For example Update JLR SDD):
- Click [Diagnostic Apps] -> [My Apps], then click [JLR SDD] and you will get a driver Update window. Click [Update]

- VX Manager will download the newest diagnostic driver from server and install

Thanks so much for sharing your time with us.
https://www.cardiagtool.co.uk/wholesale/auto-diagnostic-tools/