Ford IDS V100.03 is tested ok with VXDIAG VCX NANO hardware, and available to free download.
This post firstly shares Ford IDS V100.03 free download & nice feature, Install VMware player, finally diagnose Ford models with IDS V100.03.
Ford IDS V100.03 free download:
https://mega.nz/#F!9wRz1Bha!WAs4sDRy4sqhyJLtQnTyiA
IDS V100.03 nice feature compared with the older version: IDS V100.03 software is preinstalled in the Virtual Machine, you need only install the VM firstly then open the “VCI Manager (Ford- VCM-II)”on desktop to diagnose Ford models.
Why need to install Virtual Machine?
IDS V100.03 is compatible with all optional OS including XP/WIN 7/WIN8/WIN10 although, IDS V100.03 is only 3-days trial for free, if you need to use it for lifetime, the best way is to install on VM to lock the system time.
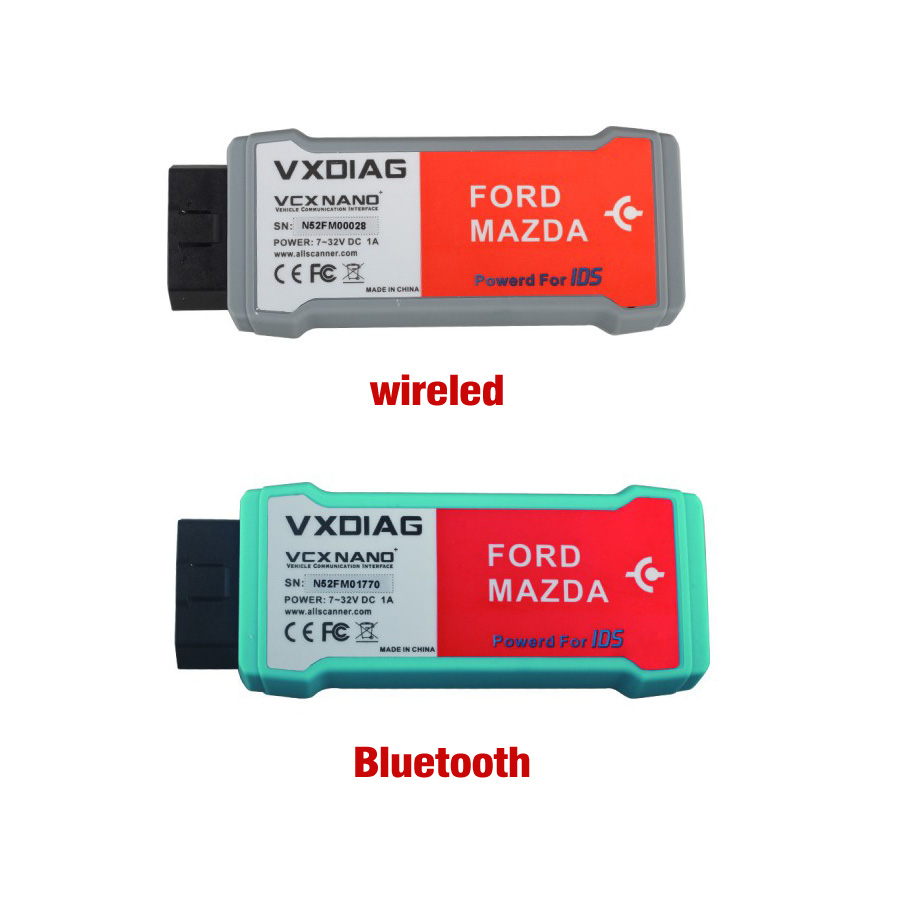
The compatible VXDIAG VCX NANO hardware:
The wired (item no. SP239) and the Bluetooth one (item no. SP239-W)
Part 1: 5 steps to install VMware player:
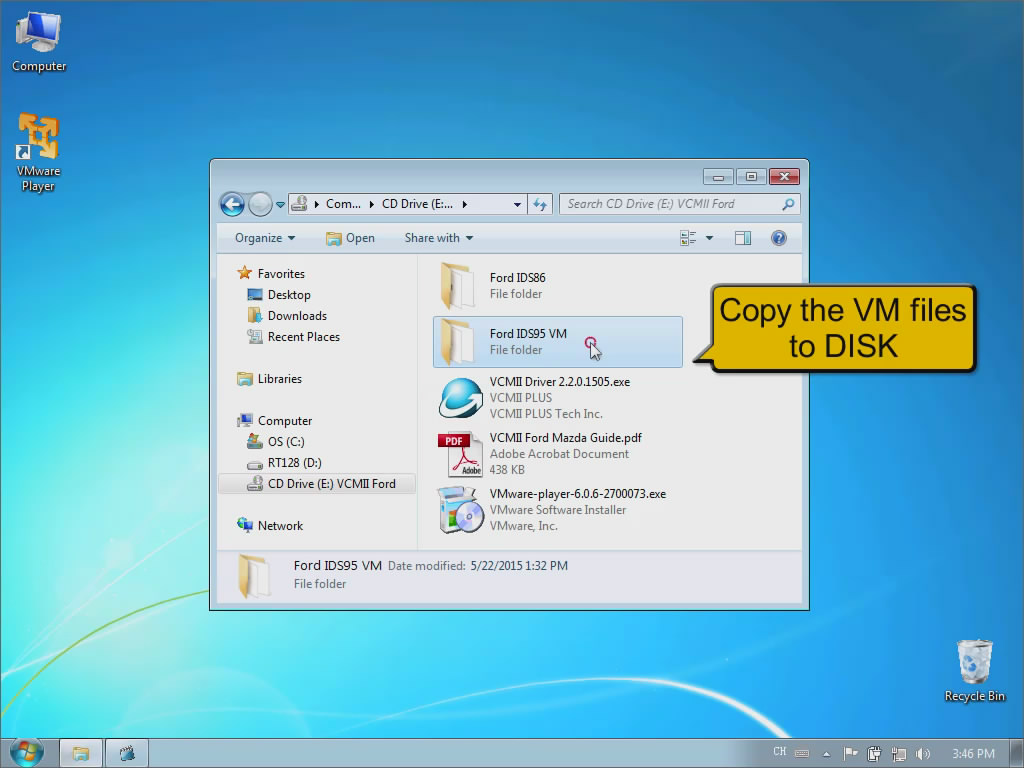
1.Open “CD drive [E:] VCMII Ford” to run “VMware player.exe”, follow the promt to accept License Agreement and select Destination Folder. Then remove the tick before both “Software Updates” and “User Experience Improvement Program”, then create shortcuts for VMware Player in Desktop and Start menu program folder.
- Copy the VM files “Ford IDS95 VM” to Disk
 r
r
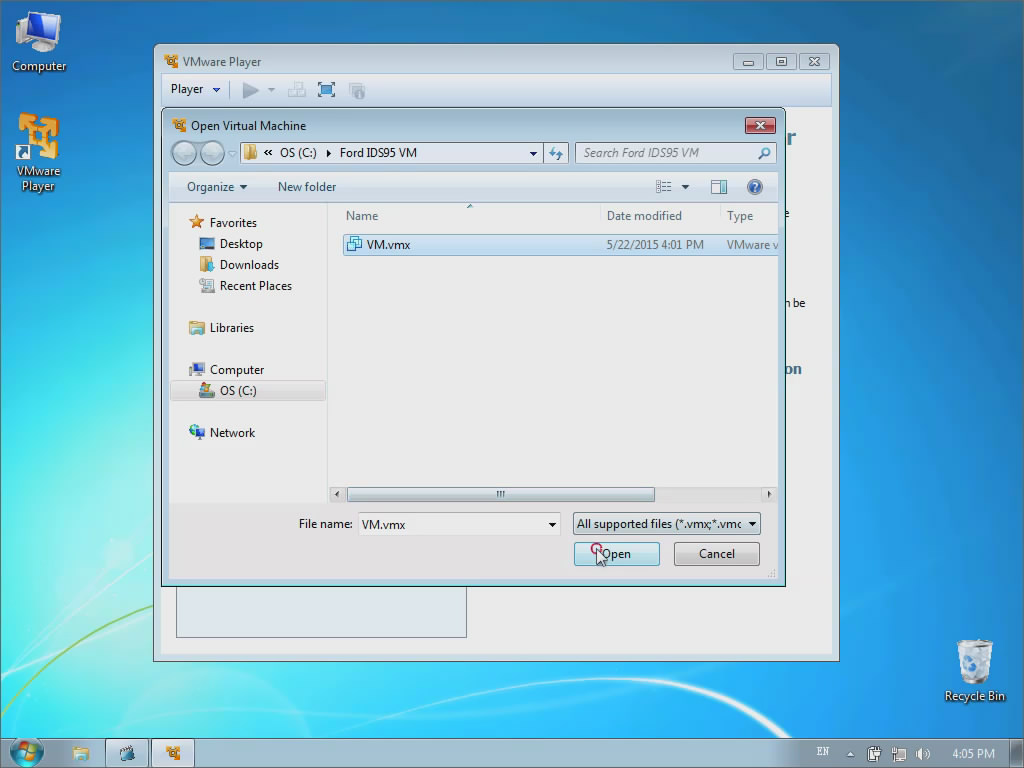
- Click and open “VMware Player” on the desktop, then select “Open a Virtual Machine” to choose from OS(C:)-Ford IDS95 VM – VM.vmx to open.
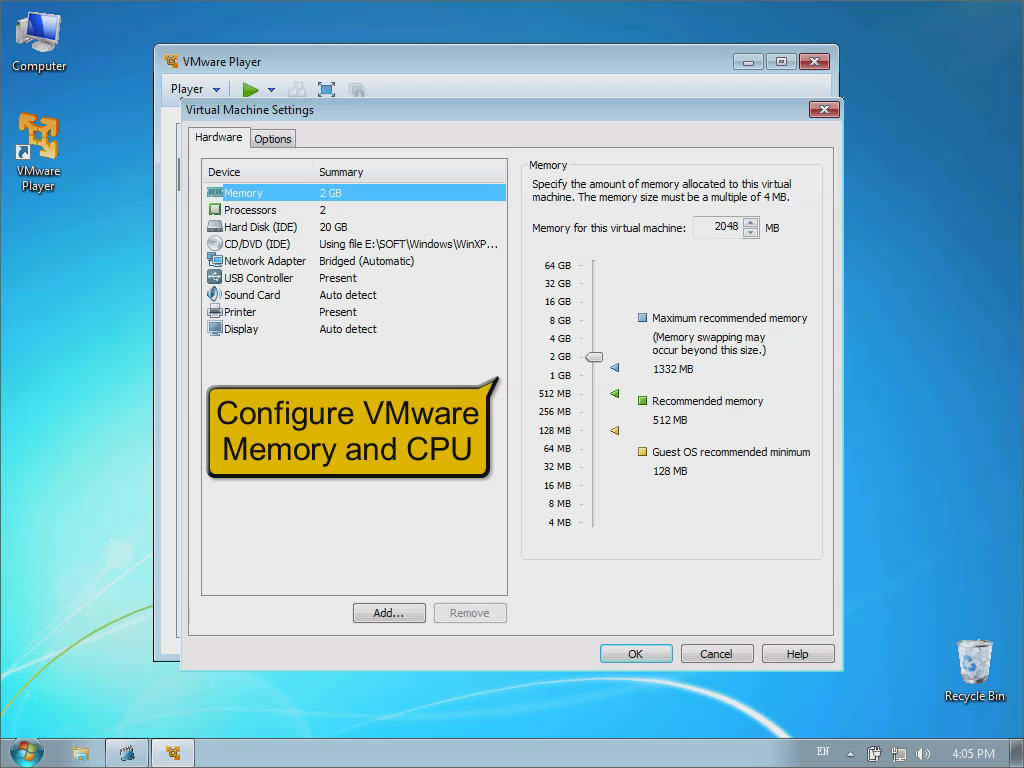
- Click “Edit virtual machine settings” to check, the hardware settings show as follows.
- Run VM.

Part 2: diagnose Ford Focus SPI 2.0L with IDS V100.03
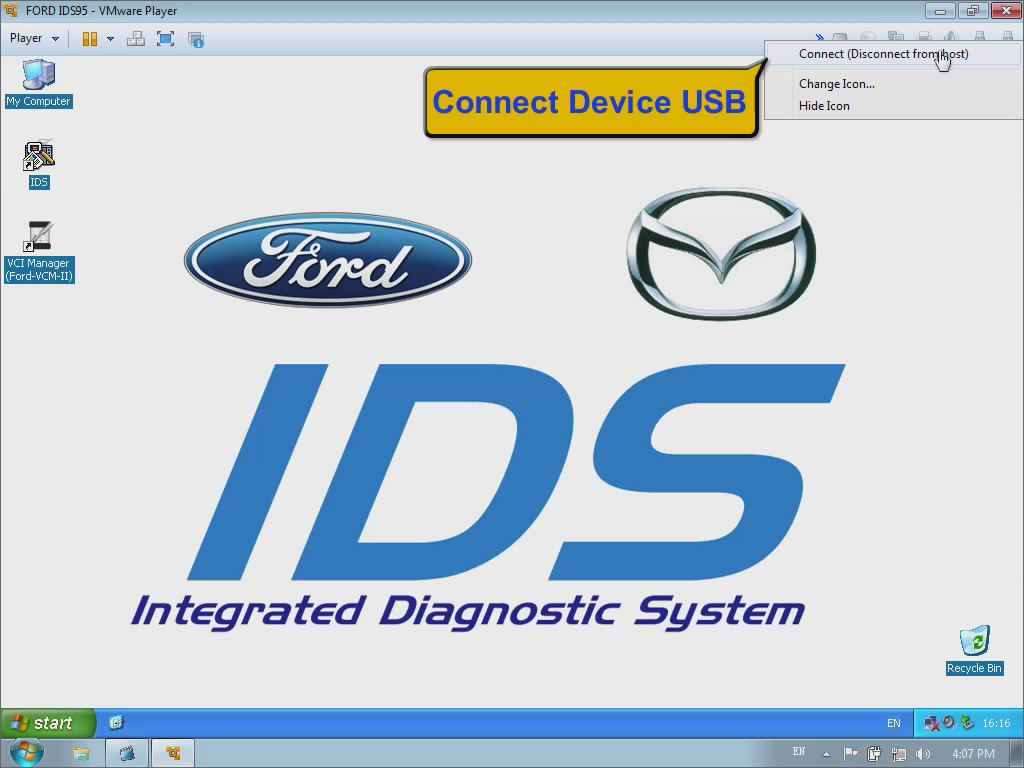
- Connect device USB
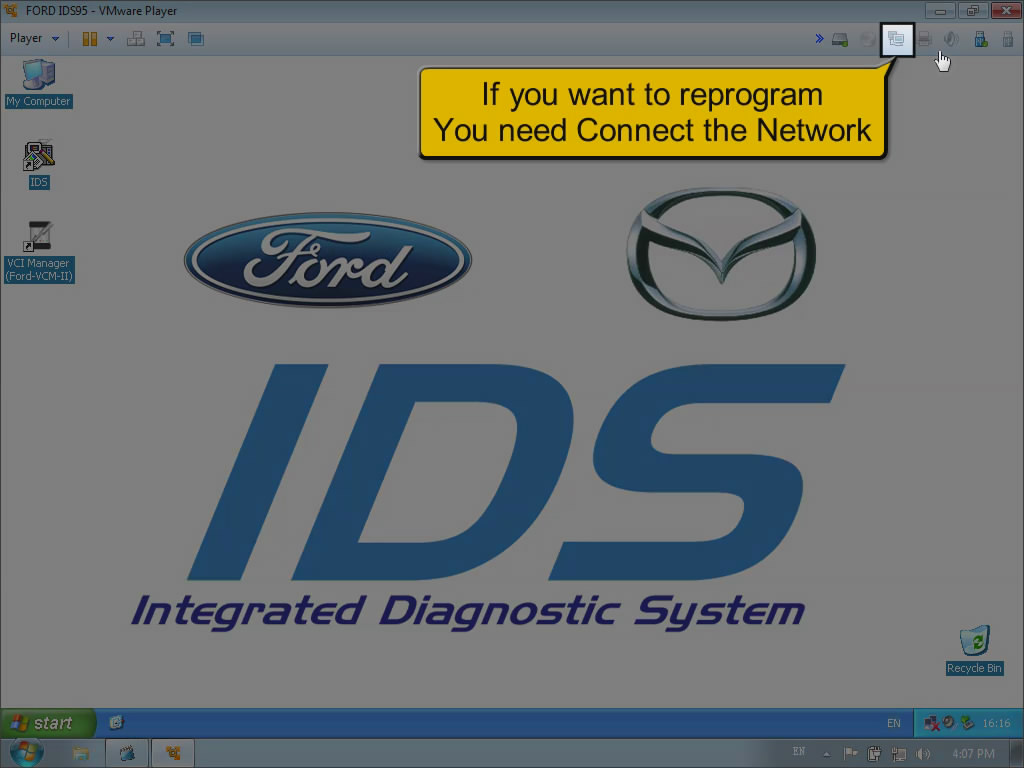
BTW, if you want to reprogram, you need to connect the network.
- Open “VCI Manager (Ford- VCM-II)” at the desktop, the device green indicator light is on, means device connect ok, exit.
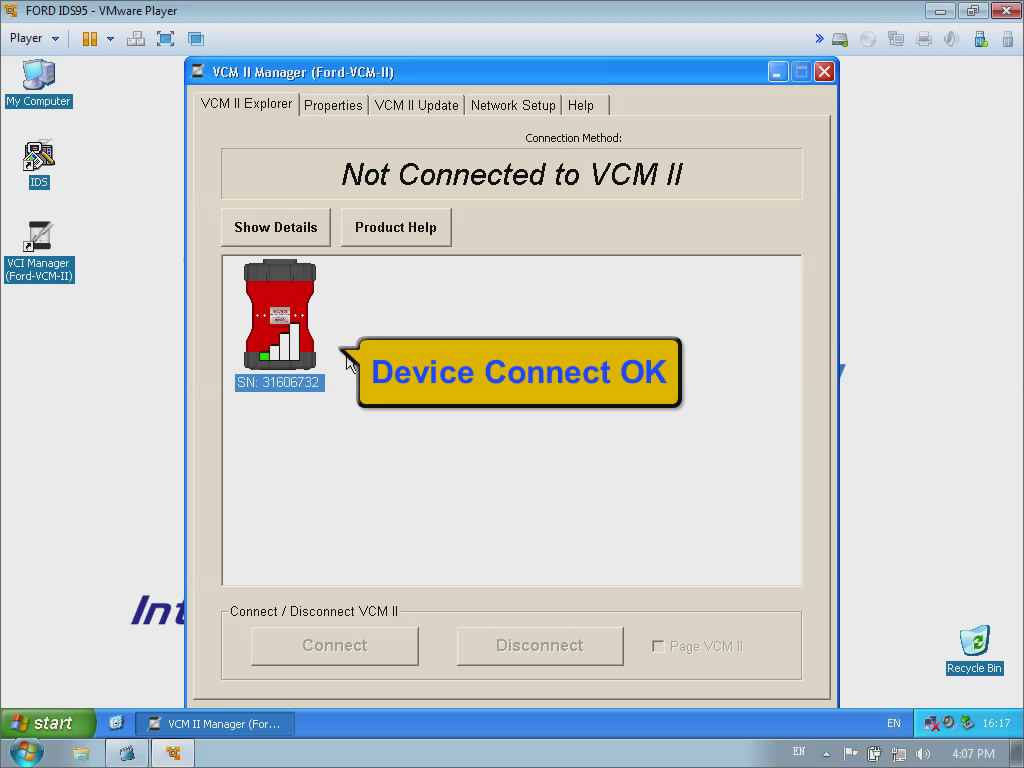
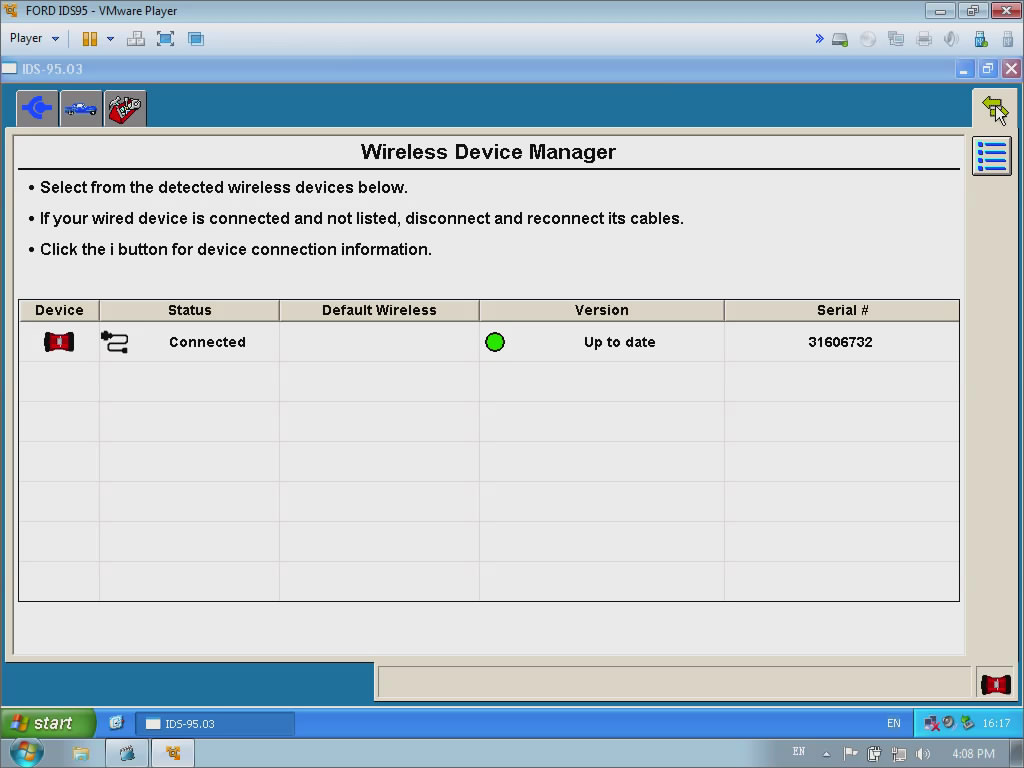
- Back to the desktop and choose “IDS”, then check VCM connected status shown as below.
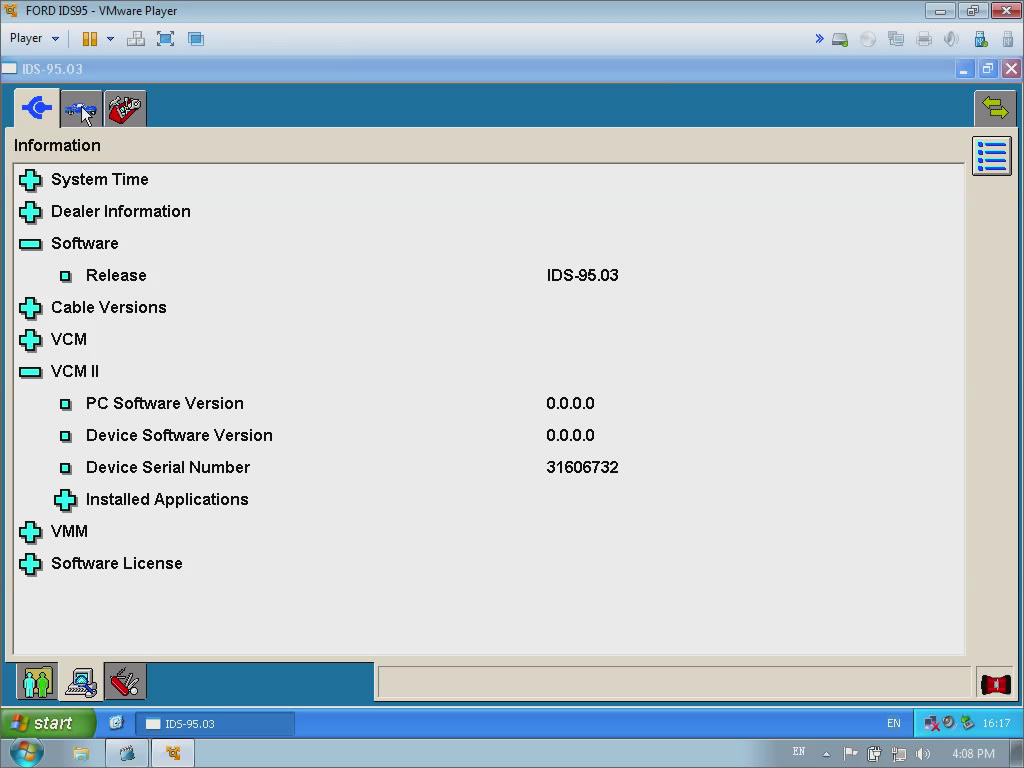
- Check IDS information
- Click the blue car icon – Start New session – all other, and click “Tick”. Then come to a new window “Establishing communication to PCM.”

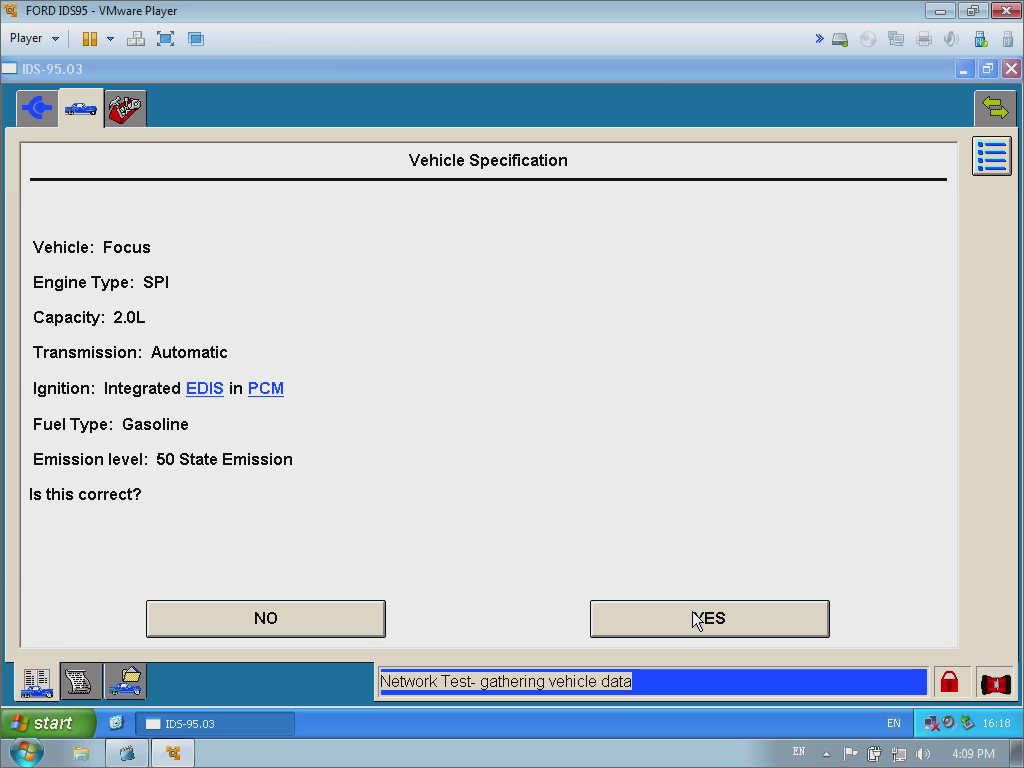
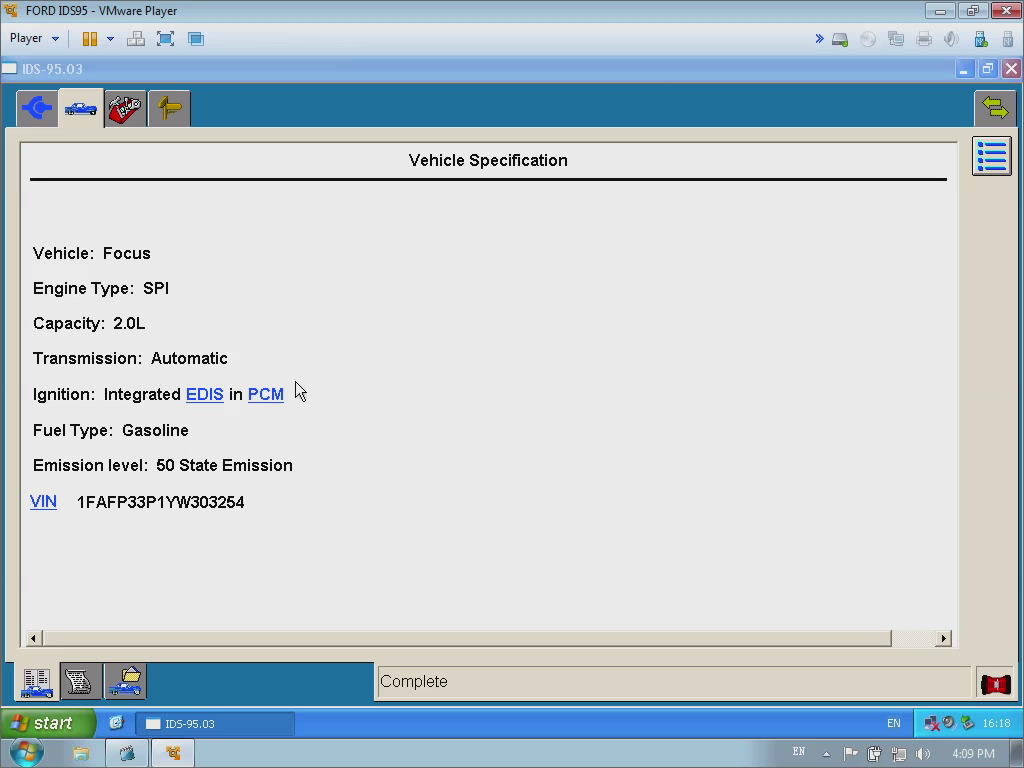
- Get vehicle specification shown as bellow, then click “Yes” to make sure it is correct.
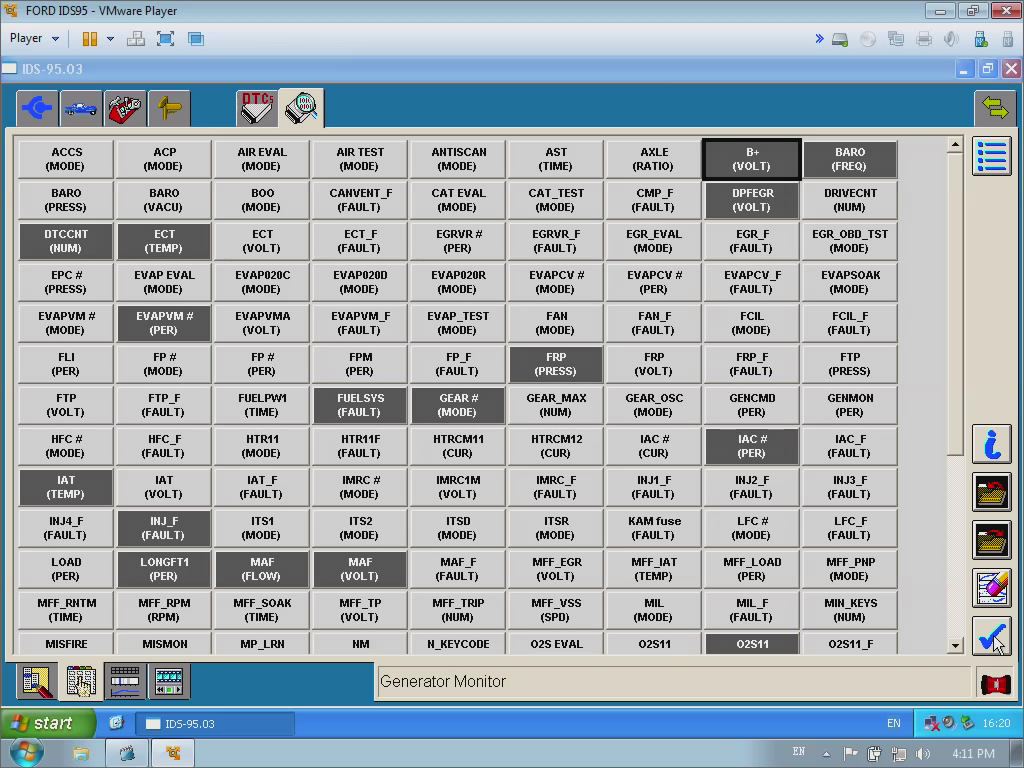
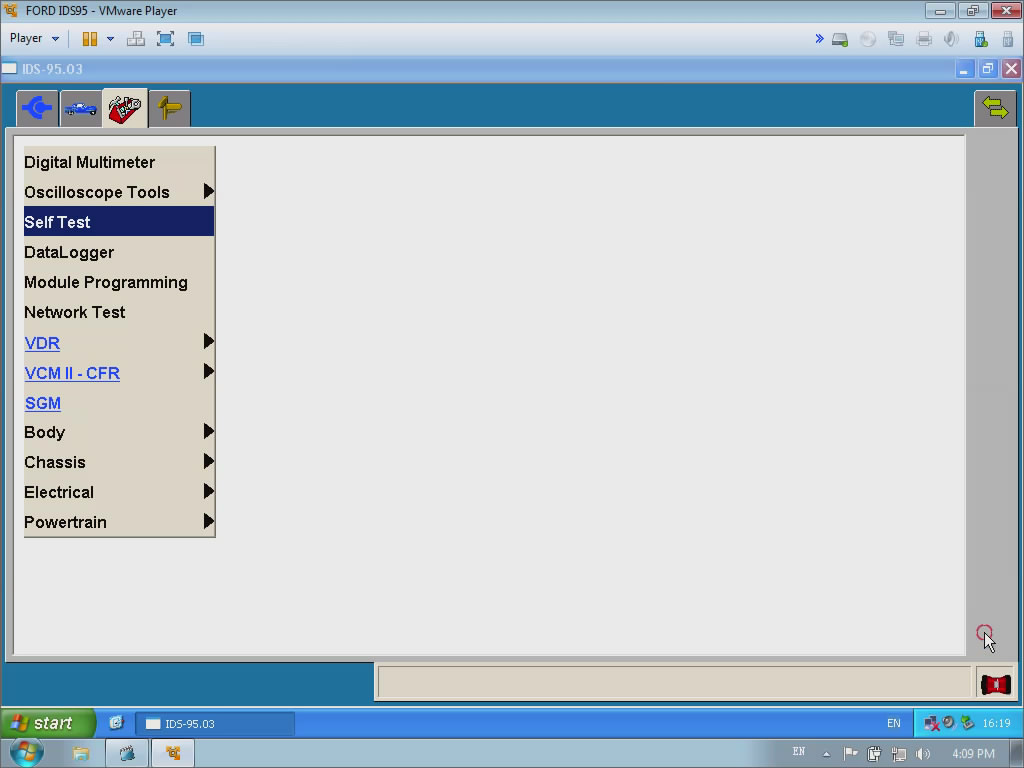
- Self Test: click the third red button at left upper side → choose “Self Test” →click “Tick”.
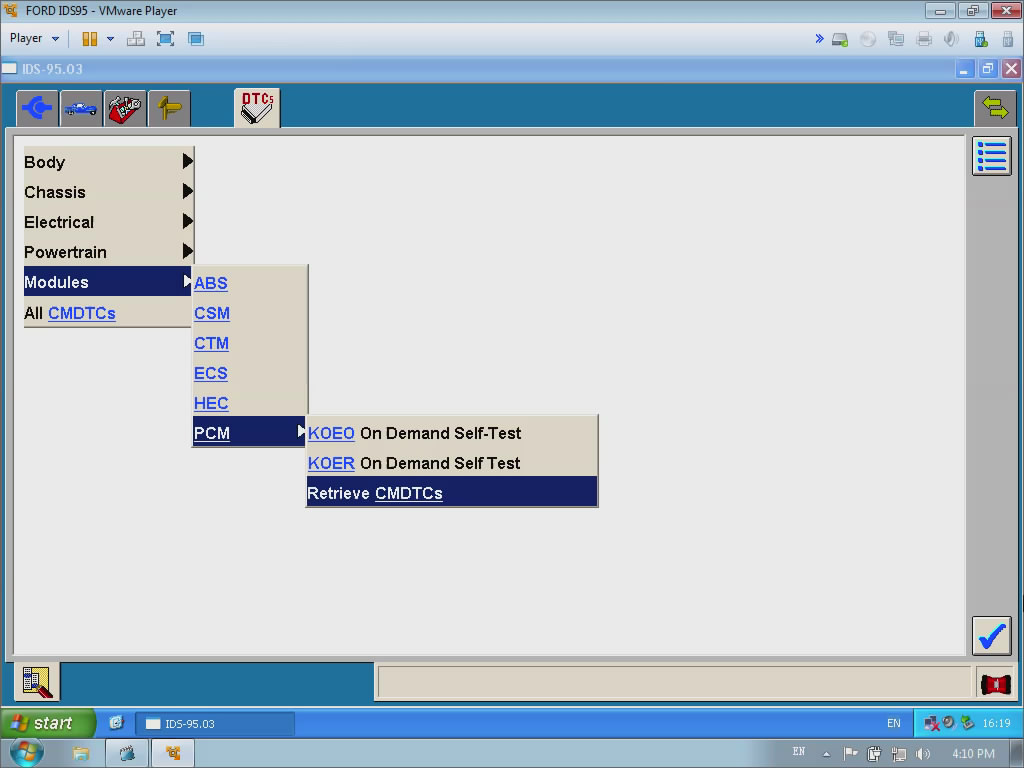
- Click the icon “DTCs” – Modules -PCM – Retrive CMDTCs, then click “Tick”
- Read out PCM CMDTCs

- Back to choose the third red button “DataLogger”, then “Modules” -“PCM”, then click “Tick”.
- Set the ignition switch to ON.
Initialization
Establishing communication with the ECU.
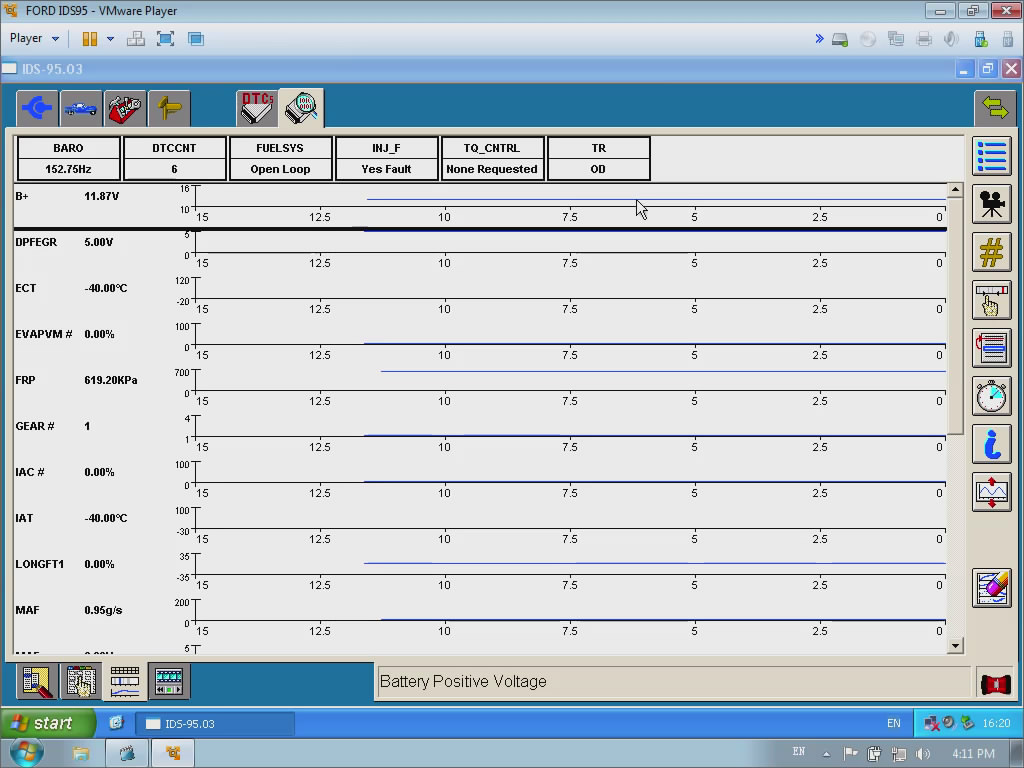
- Click “B+ (Volt)” and “Yes”.